Organizing Your Story in Novelcrafter
How to organize your project within Novelcrafter.
In Novelcrafter, your writing is organized as Acts, Chapters, and Scenes, but following this structure isn’t required - your entire story could live in one act/chapter, if that’s how you want to work (please don’t have a 60,000 word scene). 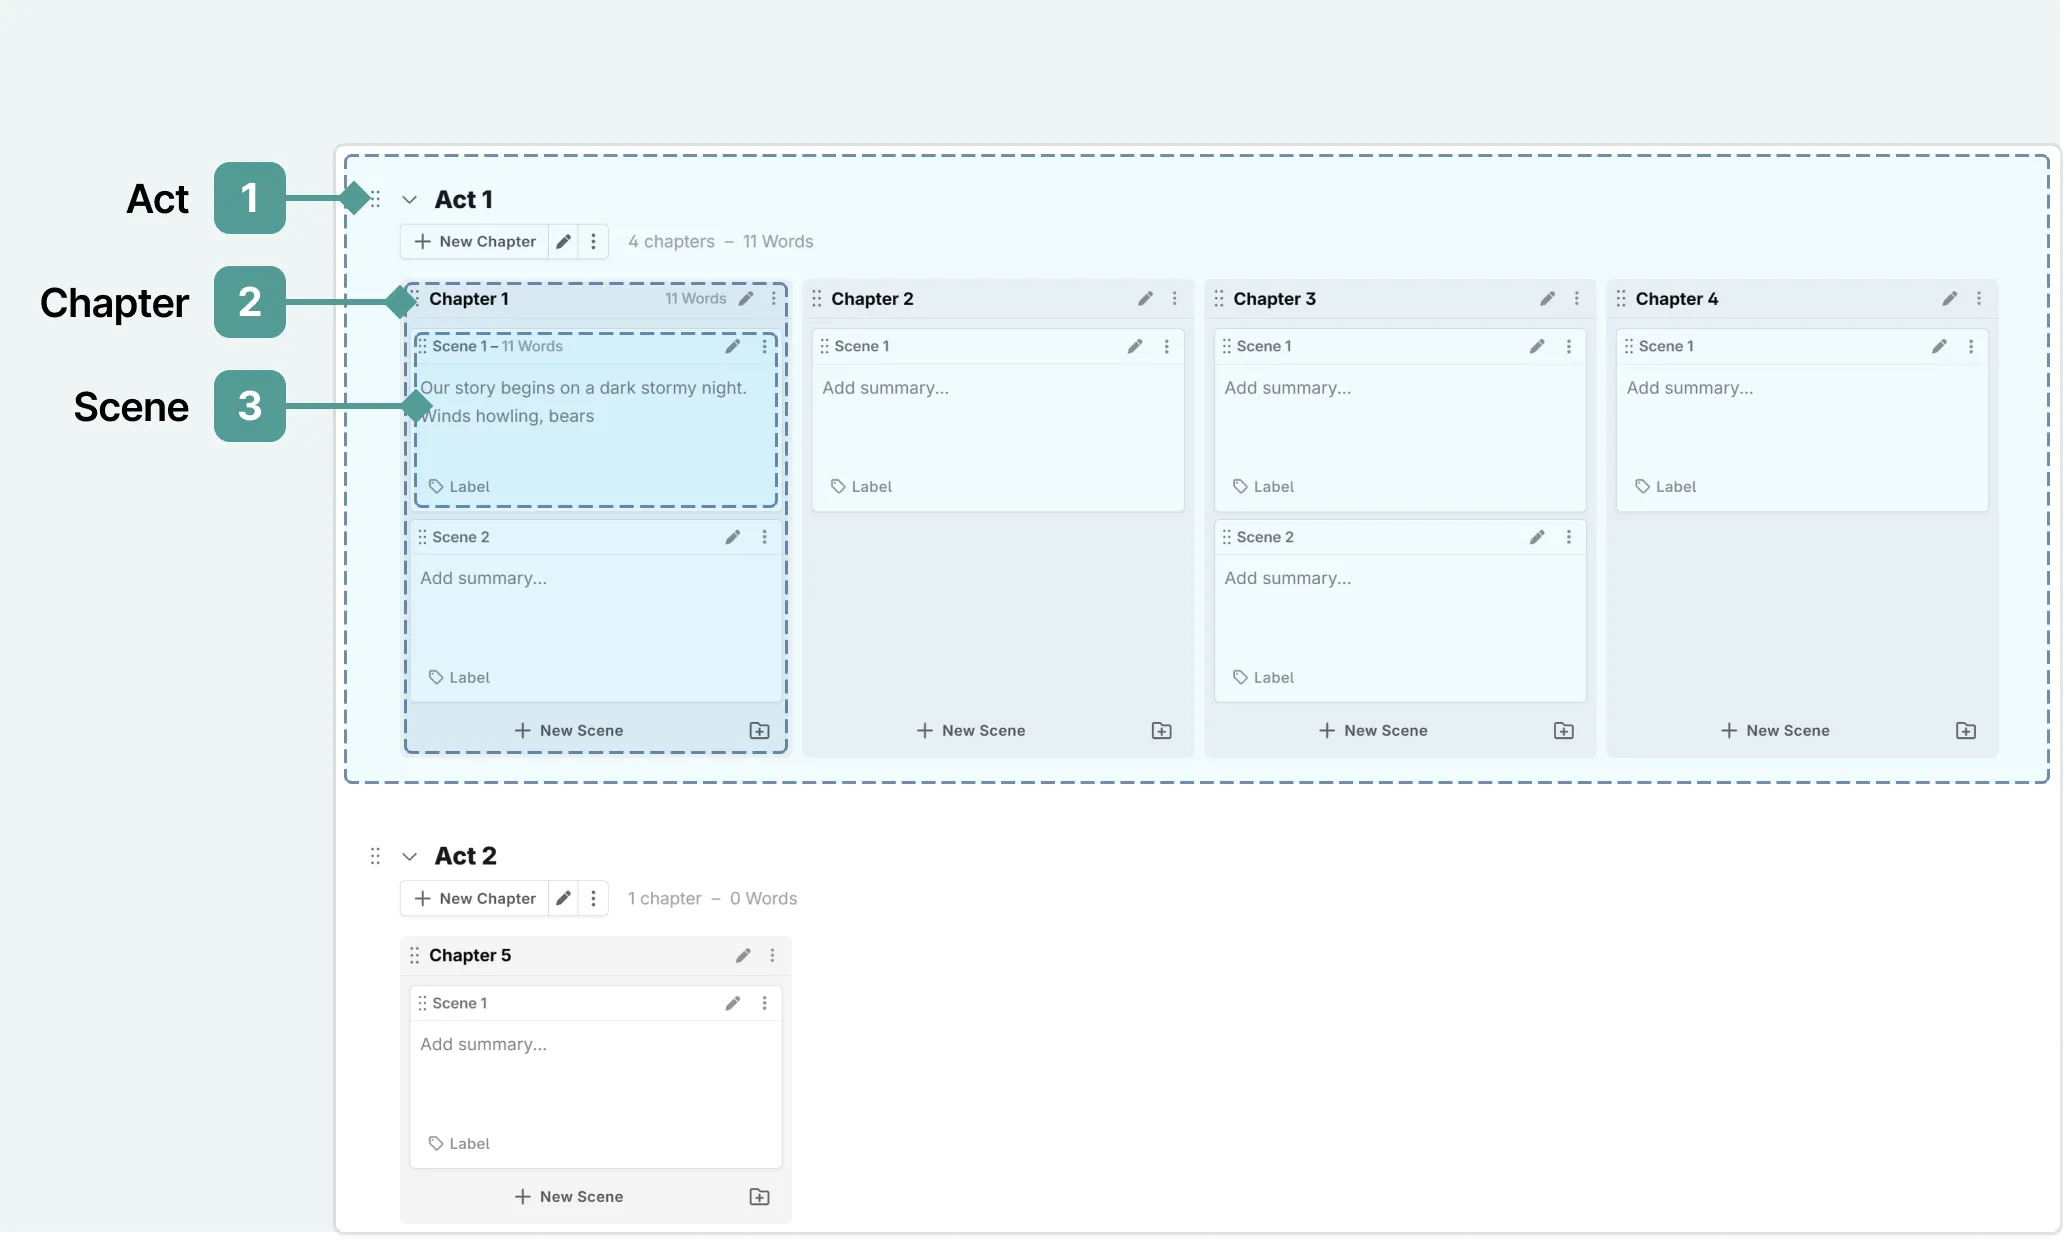
1. Acts
Acts are flexible containers that help organize larger portions of your work. While traditionally used for story structures (like the three-act or five-act format), acts in Novelcrafter can serve whatever organizational purpose you need:
- A collection of related blog posts under a common theme
- Episodes in a serialized fiction series
- Individual stories in an anthology
- Parts of a textbook
- Course modules for online learning
Don’t need acts? No problem! You can keep everything in a single act, name it “Novel”, and focus on your chapters and scenes.
2. Chapters
Chapters are the main structural elements your readers will see. Each chapter can contain one or more scenes, and you can easily reorganize them within or between acts as your story evolves. Chapters can be named (for example, if you have a prologue, or want to name your blog post).
3. Scenes
Scenes are where your actual writing happens. Each scene typically represents, for example:
- A single point of view
- A continuous sequence of events or time period
- Action happening in an area/location
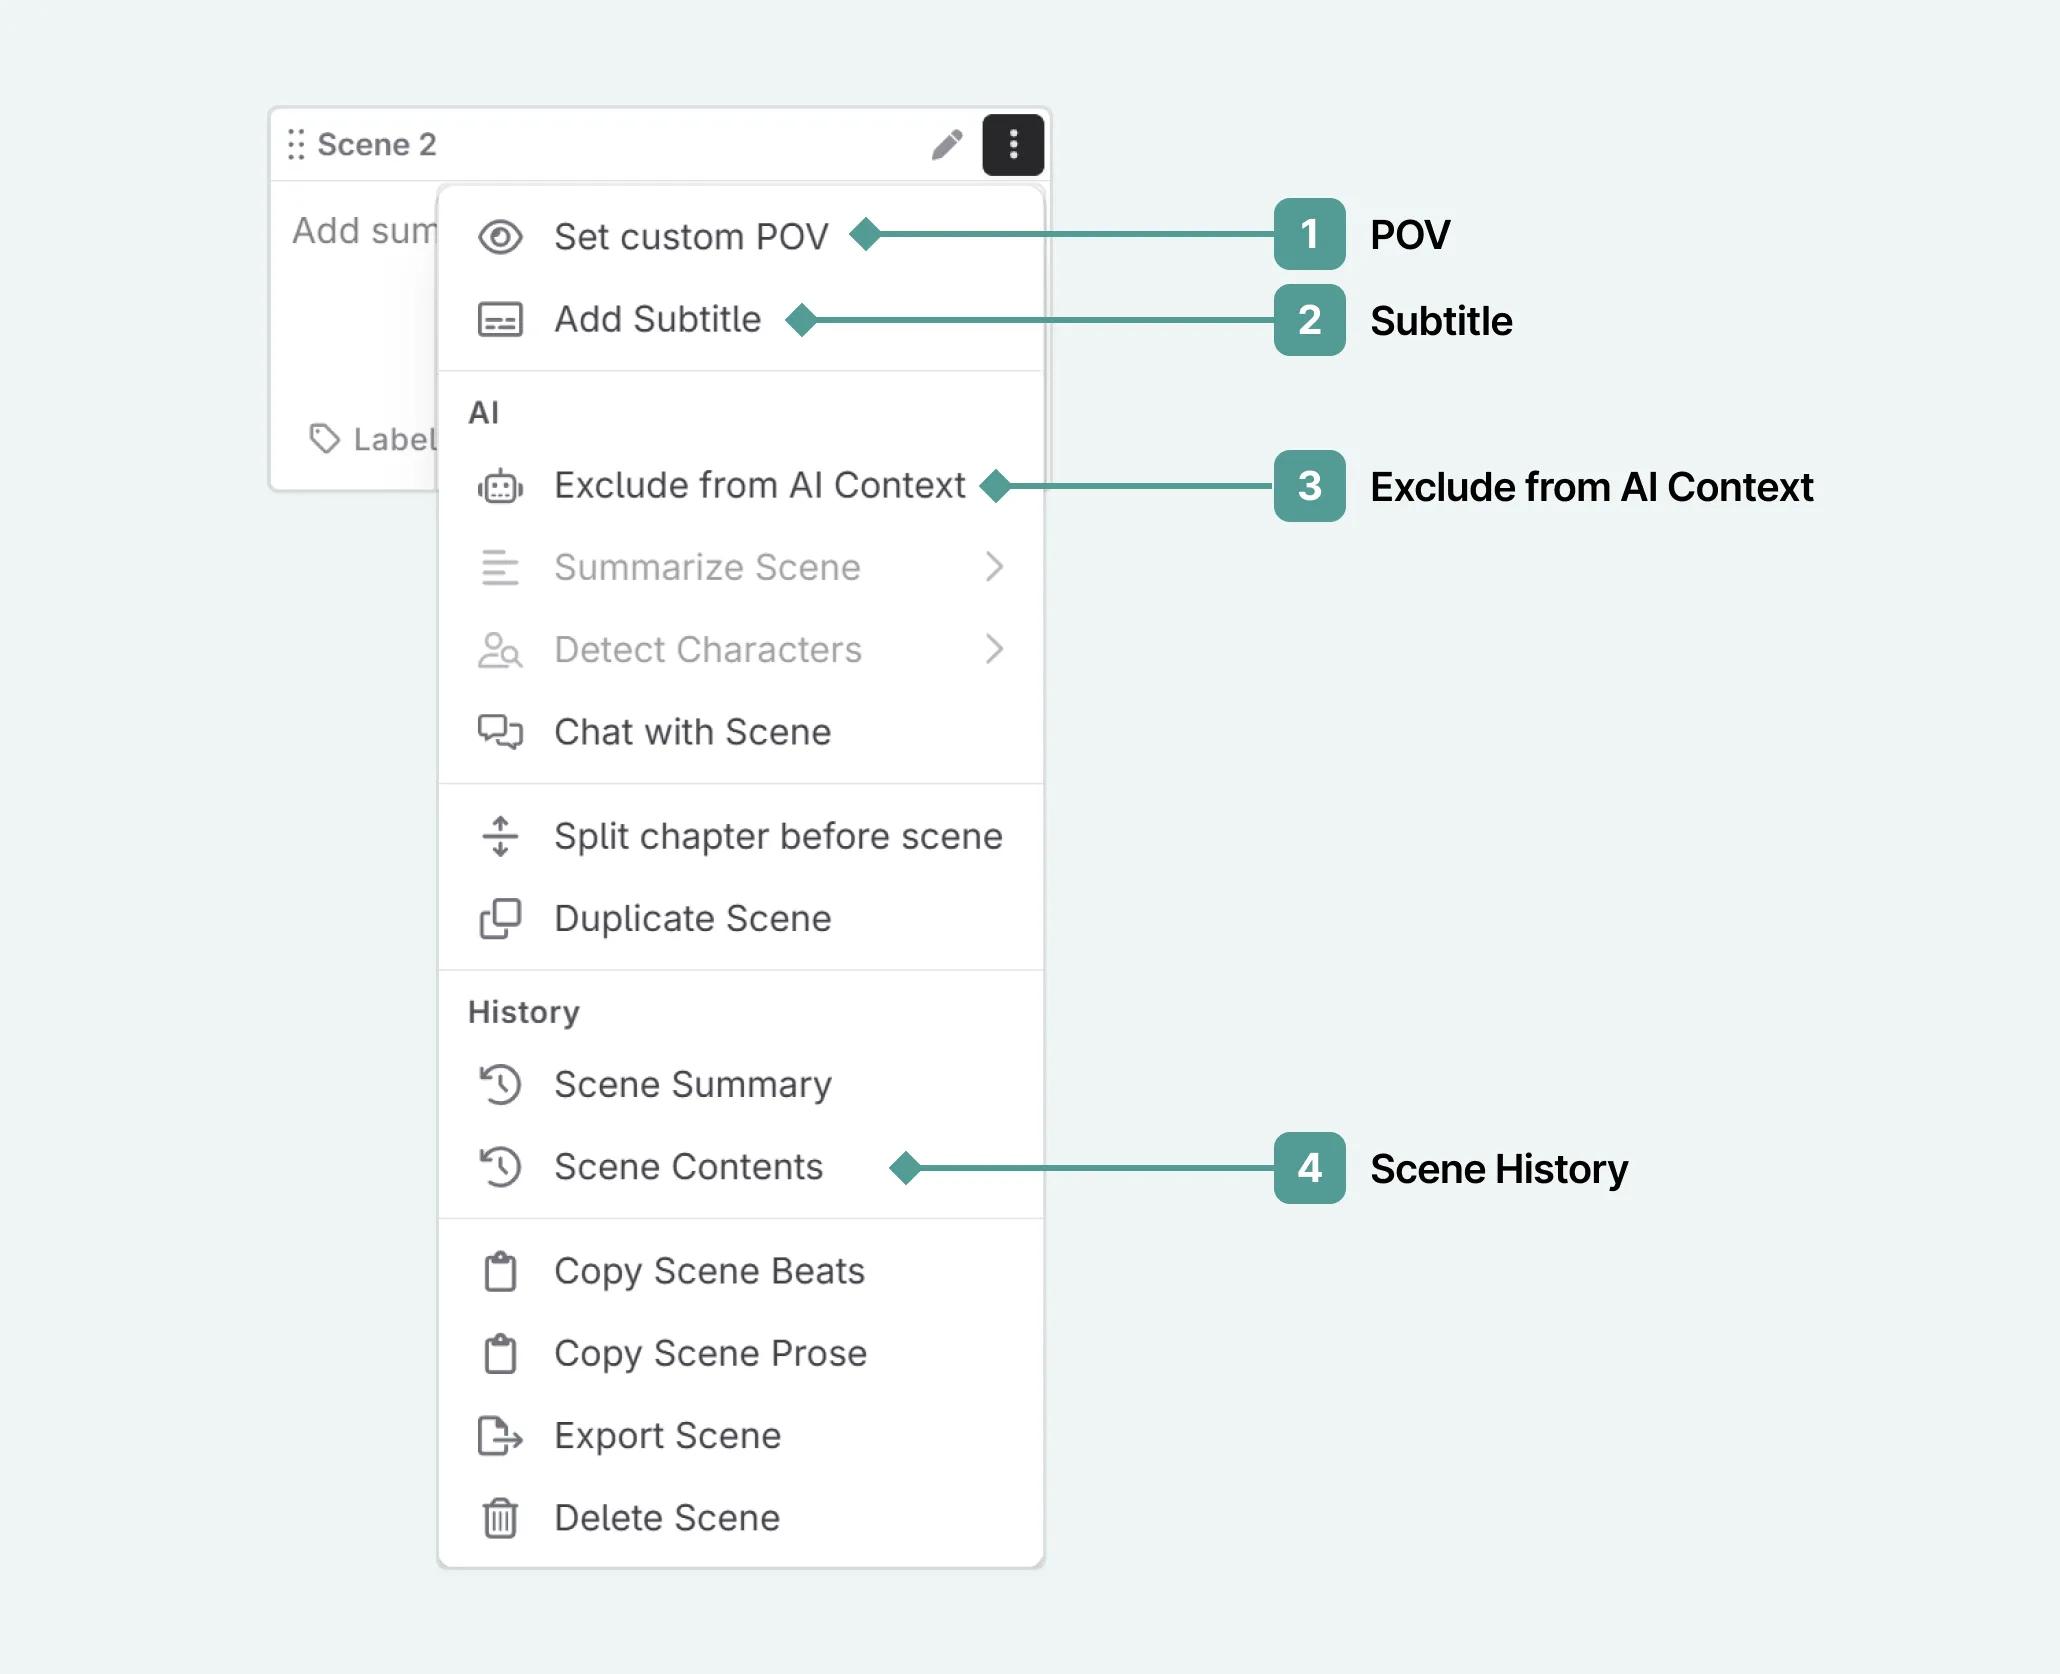 Within scenes, you can set a POV (1), add custom subheadings (2), indicate if they can be “seen” by AI (3), and view scene revision history (4). You do this by clicking the actions menu (the three vertical dots).
Moving and creating new scenes/chapters/acts
Creating a new act/chapter/scene
- Plan Interface: Press the + new scene/chapter/act button. This will add a scene to the end of the current section (i.e. a new chapter adds to the end of the act, and a new scene adds to the end of a chapter).
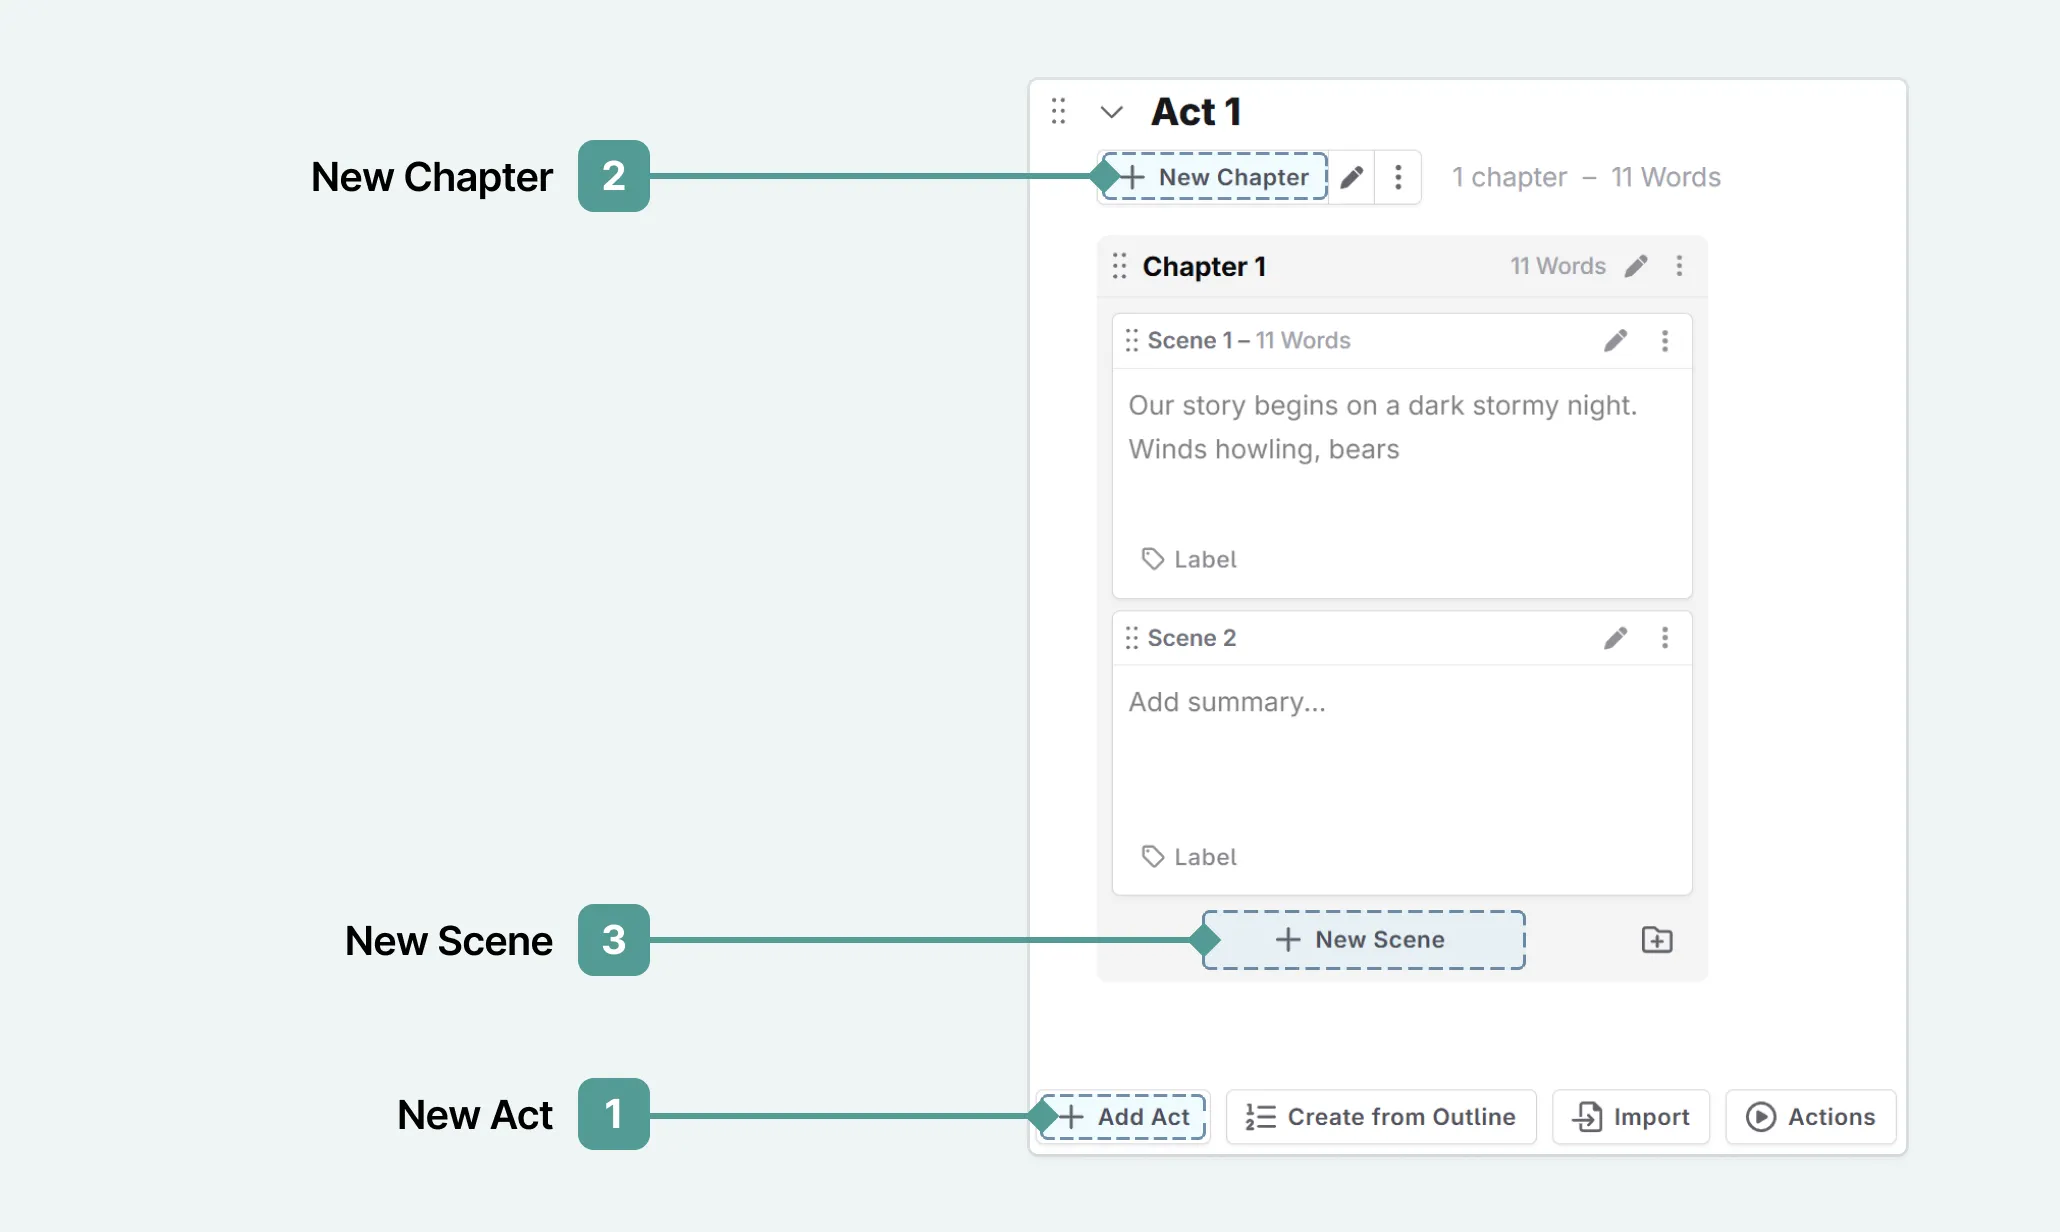
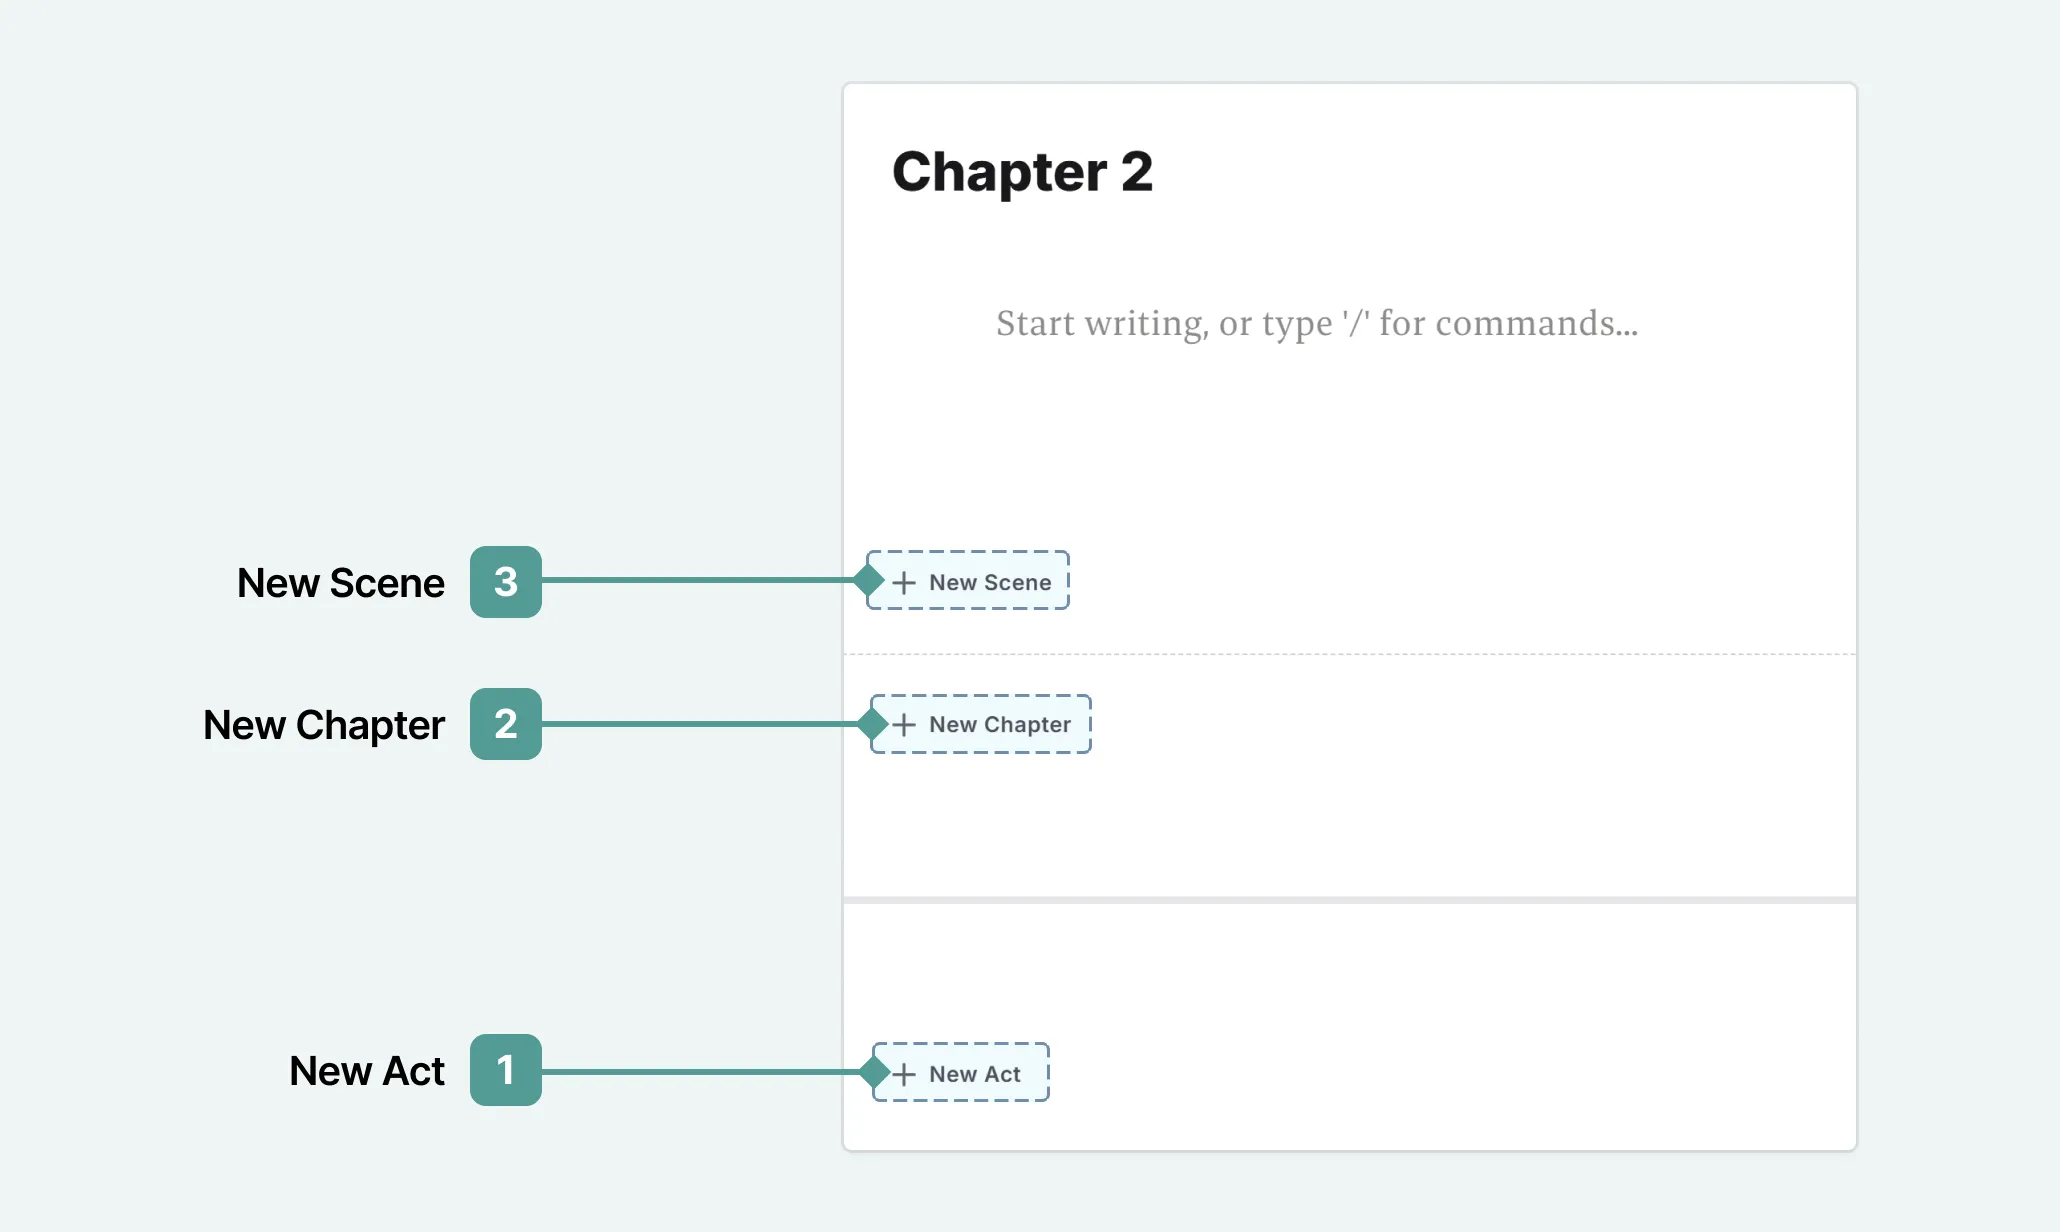
- Write Interface: At the bottom of a chapter or act, you will see the + new scene/chapter button.
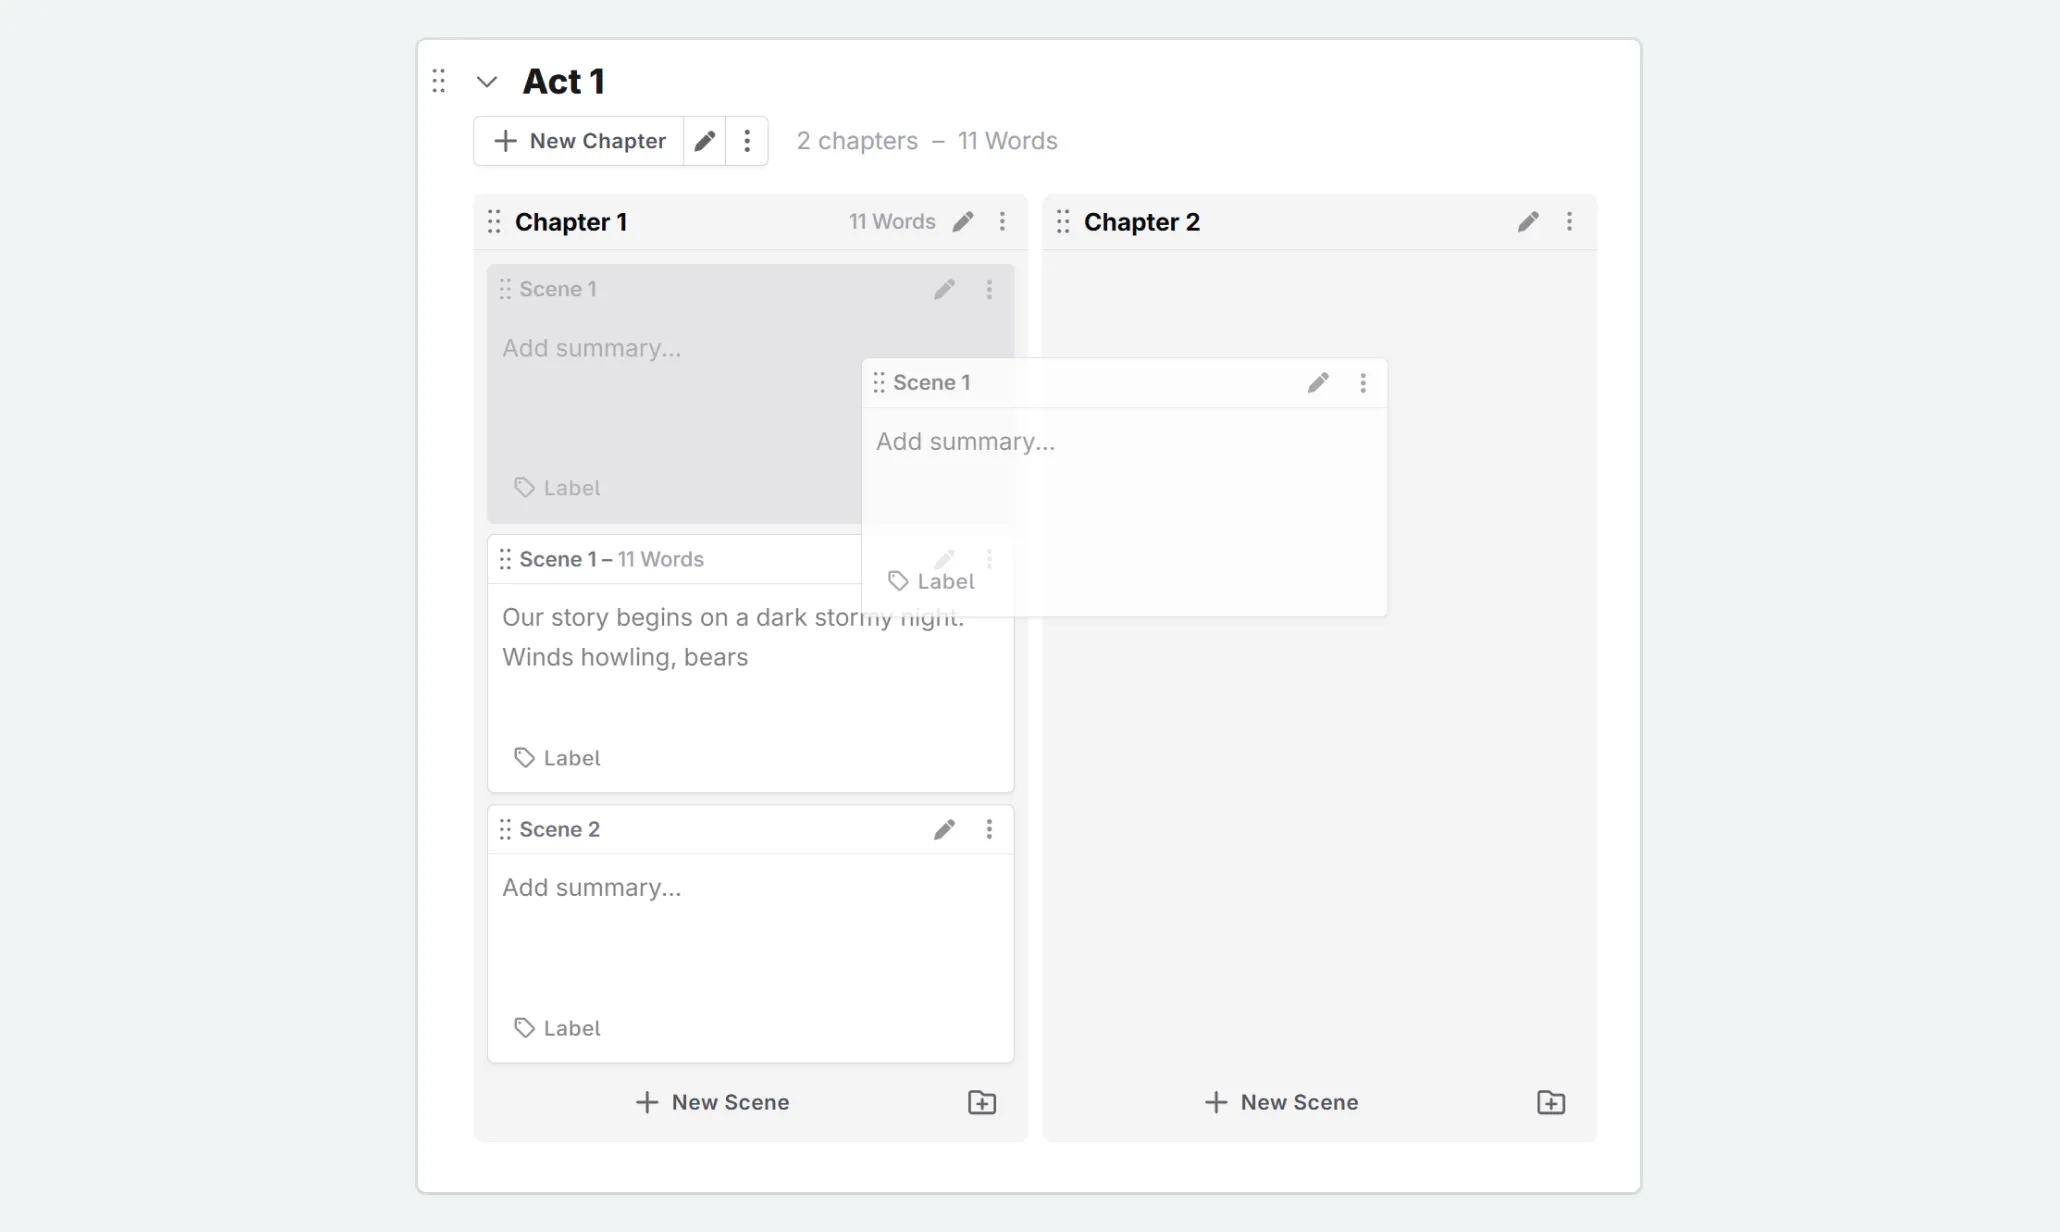
Moving acts/chapters/scenes
- Go to the plan interface.
- Click and drag the six dots to the left of the scene/chapter/act title.
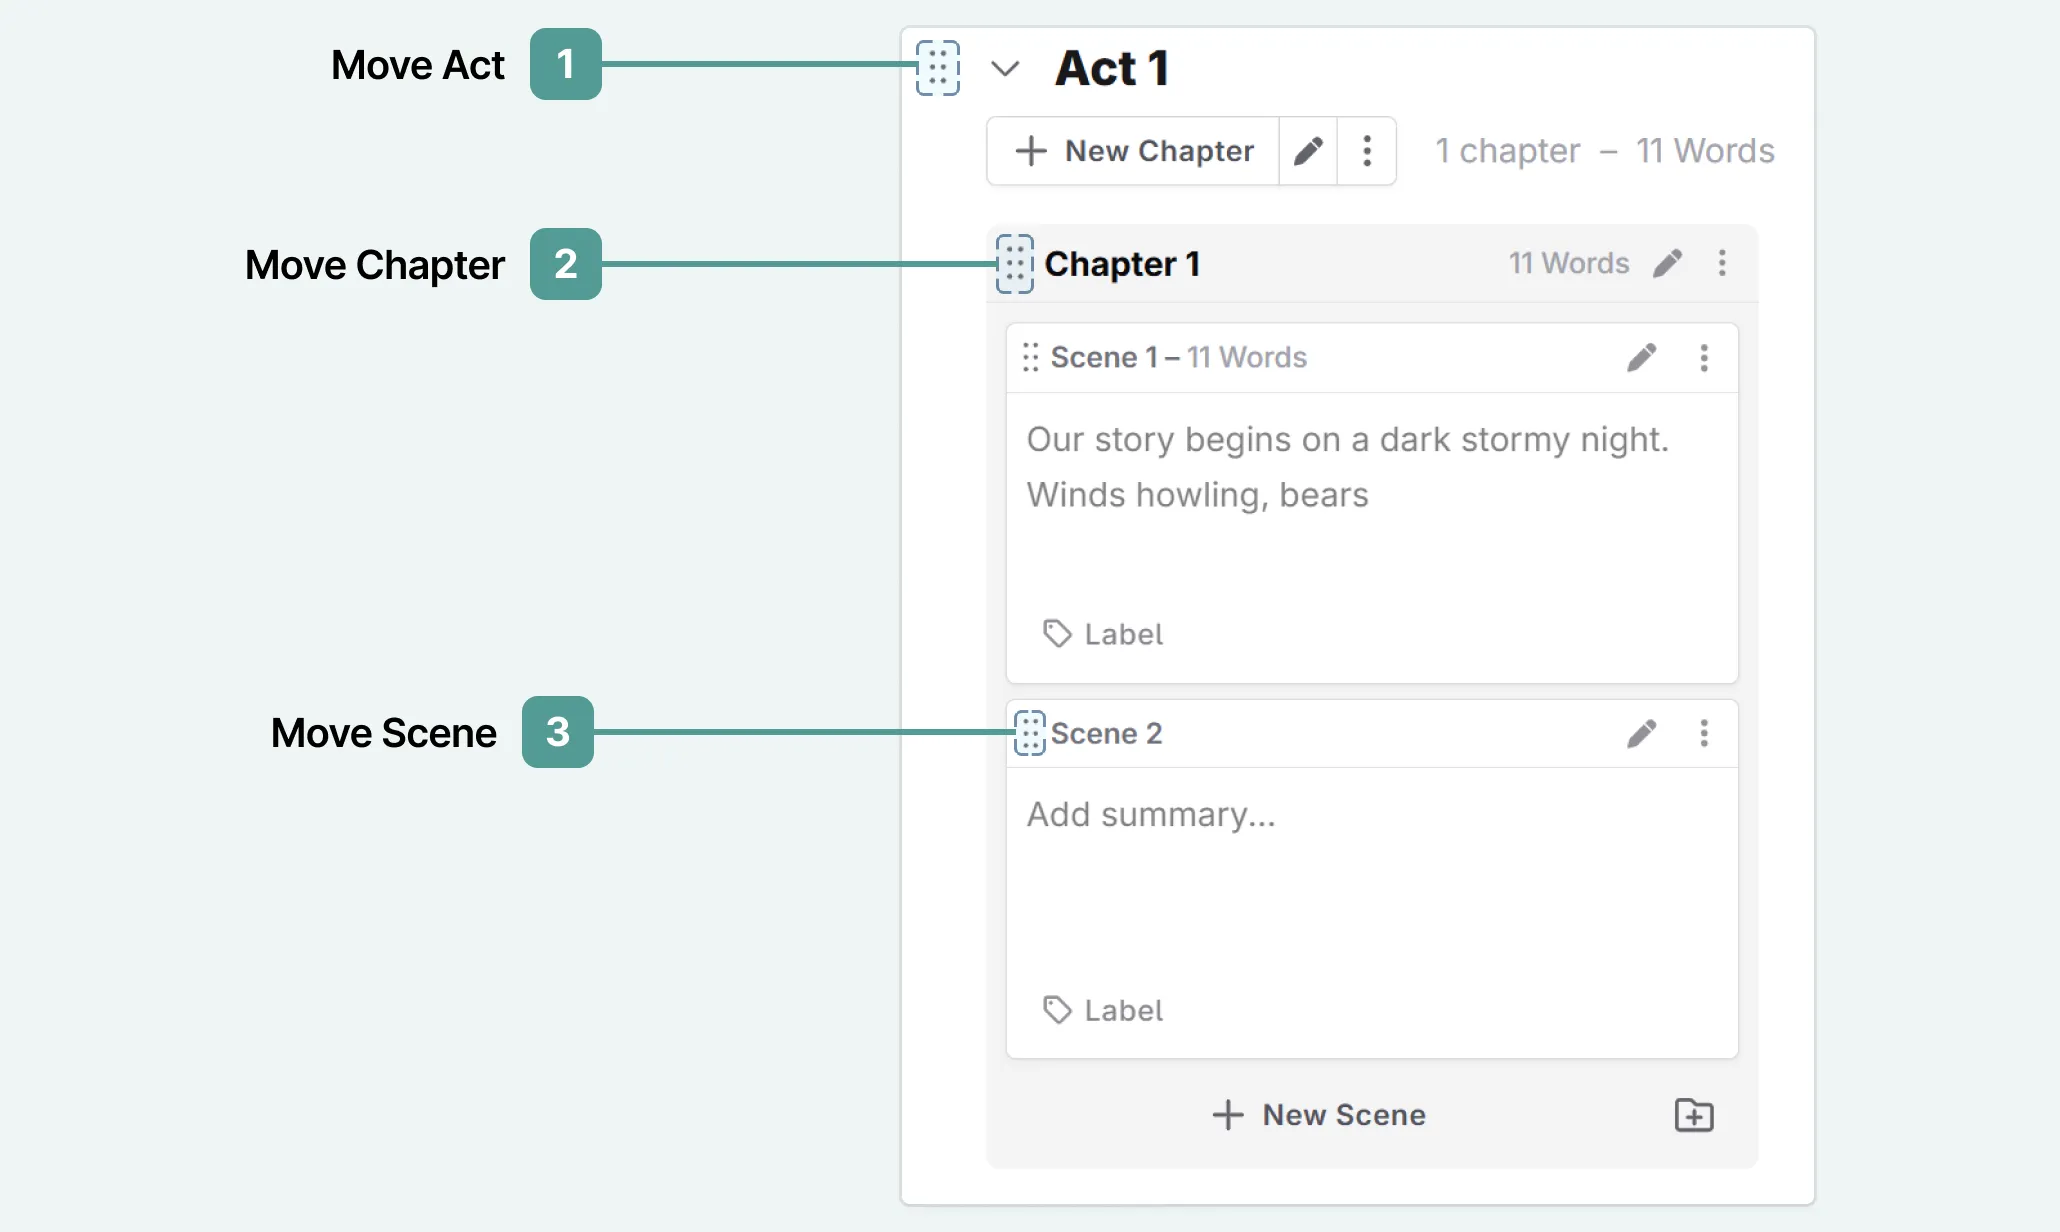
- Move the act/chapter/scene to your chosen location
To rename an act or chapter:
- Click on the name of the chapter or act
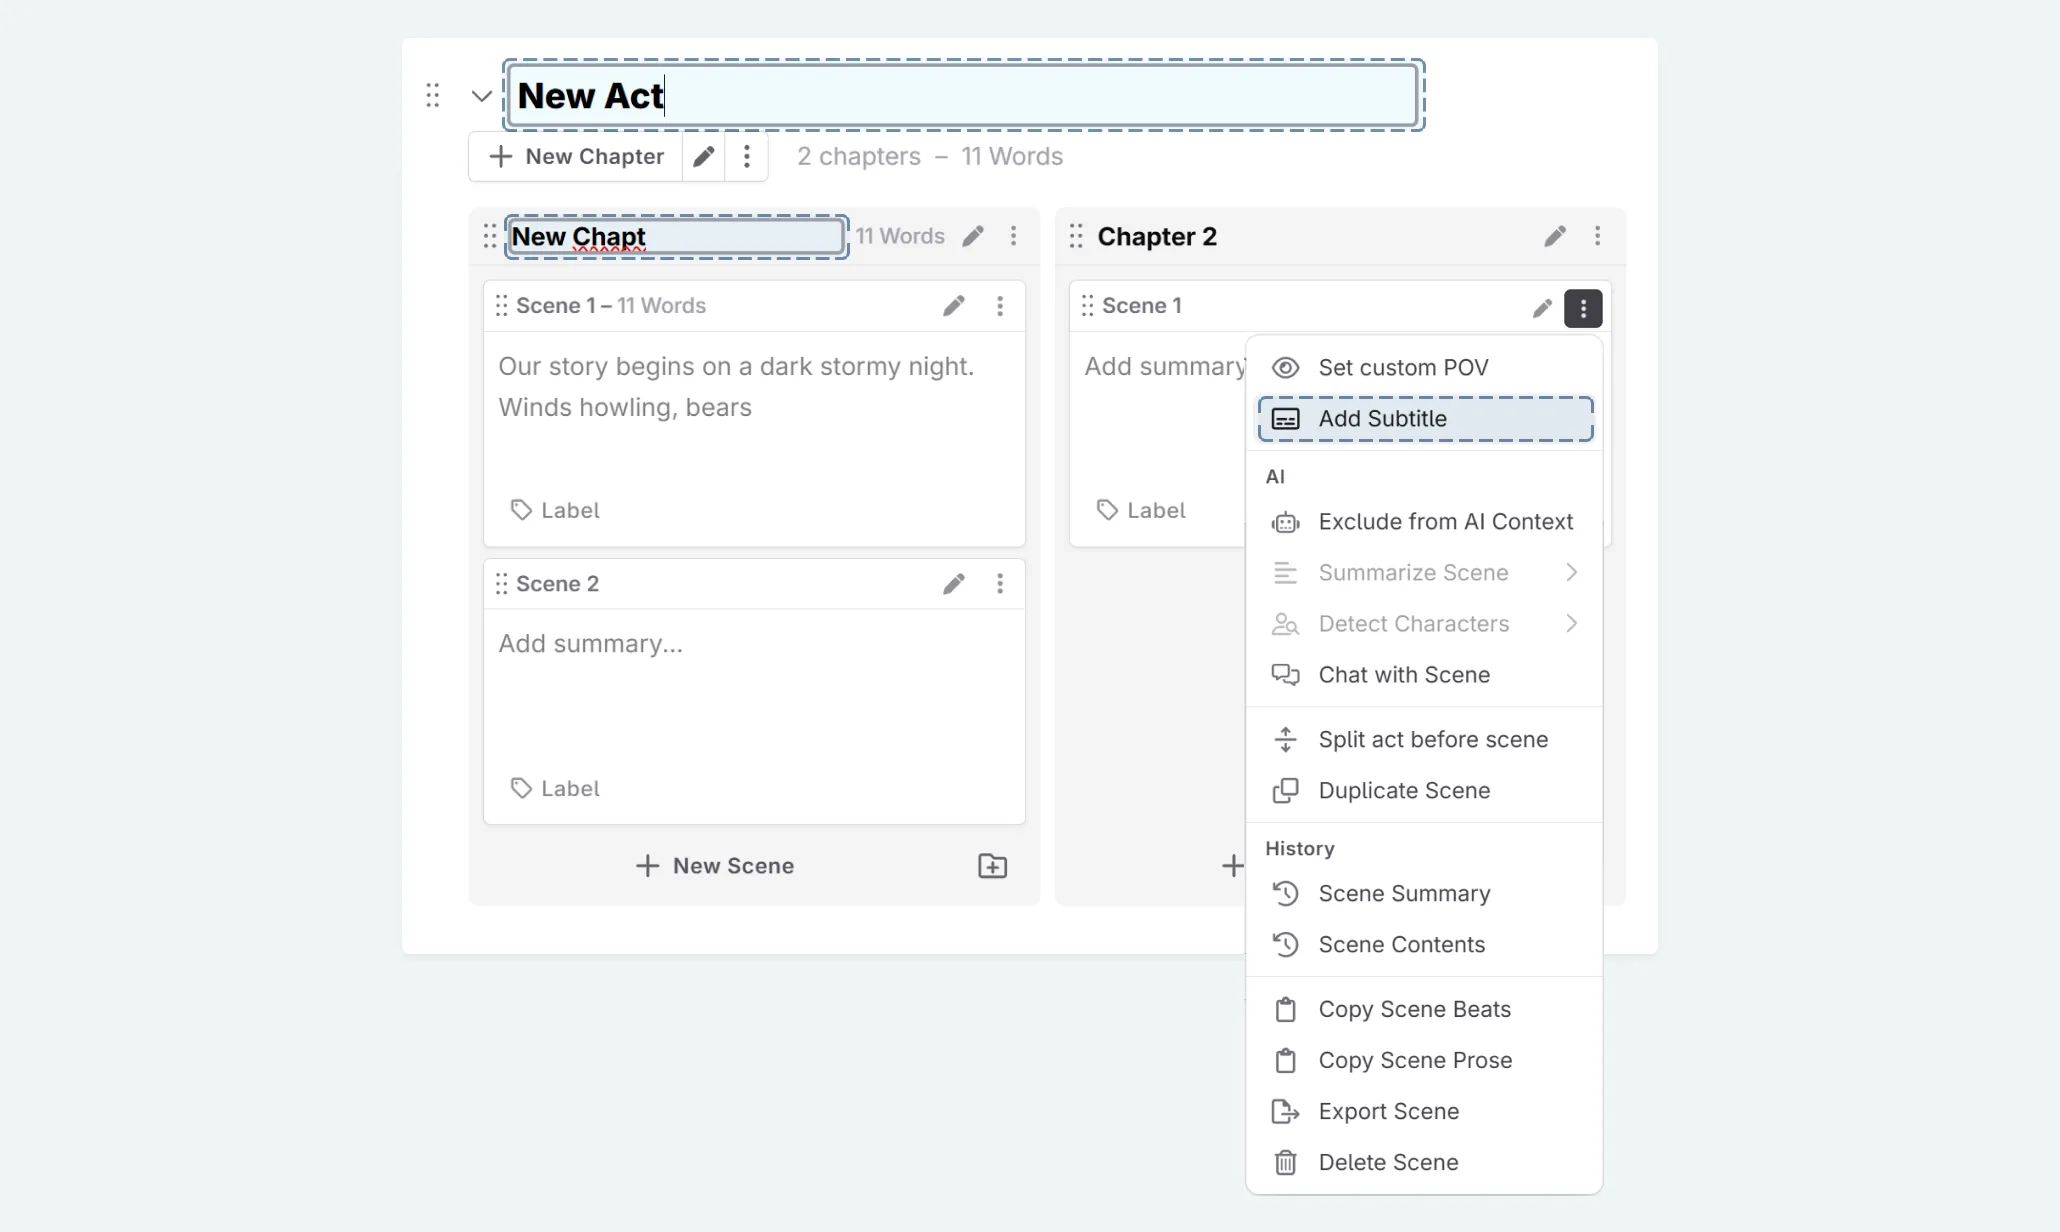
- Rename it.
If you want to make a prologue, and have the chapter numeration reflect this, you will need to disable numeration. You can do this from the actions menu for the act/chapter in question.